Wednesday, June 13, 2012

Welp, that needs to be in and around my mouth... ASAP

This blog includes recipes for "drunken, roasted chicken" and "Pinterest broccoli".


     I know you've all missed me with the fire of a thousand burning suns, but I'm back! (Momentarily, or until my next bout of ADD hits me in the face). Of course, the same excuses; work and school, which is what my life mainly consists of. I'm hella busy. But, still cooking!

     This go around, I'm going to teach you all how to roast a delectable bird that will give you that moment of clarity when you bite into good food, close your eyes... and you're taken to a place of food euphoria. Plus, it got the roommate approval. Which is very important. Oh, and did I mention, it has booze on it. WIN.

Drunken, Roasted Chicken


This, my lovelies, is my victim. This poor, little Patti Jean rock Cornish game hen. Tragic, but damn, that bird's delicious. Plus, as you can see in comparison to my hand, it's not that big. It feeds 2-3 people, which is great when you live with one other person. If you're feeding 4+ people, or my brothers, buy a couple birds. Next time, I'm going to roast two; one to eat and one for leftovers. Especially so I have something to bring to work so I'm not stuck eating watermelon and a microwaved potato for lunch. I kid you not, that is what I had for lunch today.

Stuff You Will Need:
  • A cornish game hen
  • An apple, preferably a green one. Or an orange. That'll work, too.
  • An onion
  • 6 cloves of garlic (You know it's a Lindsey recipe when....)
  • Olive oil
  • Some form of clear-ish alcohol (I used beer, it calls for white wine)
  • A chicken bouillon cube (This is basically a condensed cube of salt that makes water taste like chicken noodle soup broth)
  • Rosemary

     To start off, you need to thaw the bird. AKA, put in room temperature water (I fill the sink up and let the bird swim before it's tragic end) for approximately 3-4 hours. When you cook chicken, turkey, Cornish game hens, whatever, it needs to be thawed or it will cook unevenly, and you will have wasted time on a potentially delectable dish.

     So, I let the hen thaw for about 3 hours, and because I was in a rush, I unwrapped the hen and put it in a bowl of water so it was submerged and added 1/4 c. of salt. I'm not going to get all scientific on ya, but, it has to do with osmosis and salt replacing water in the chicken. (I think). In simple terms, it salts the bird.

If you're a vegetarian, this is the time to scroll down... VERY quickly.
(Go to the broccoli section).
  1. Leave the bird wrapped, and thaw it in cold water for 3-4 hours. (This time will change if you're thawing a chicken or turkey).
  2. Unwrap the bird.
  3. Let the hen sit in a salt water mixture. (I used about 2 gallons of water with 1/4 cup of salt. I'd let this mixture sit in the fridge for 2-3 hours).
  4. Once you've let the hen do its thing, take it out of the salt bath. Rinse it with water.
  5. Preheat oven to 450 degrees.
  6. Cut up an apple and an onion. Here's where it gets nasty...
  7. That's right, you gotta stuff stuff in the bird's rear. I have to go to my happy place as I'm stuffing apples, onions, and rosemary into this thing. Don't laugh at my picture either, I was trying to keep the precious, Mr. iPhone out of turkey. Lets face it, Mr. iPhone is my most serious relationship, and it's probably a good idea to keep him out of a Cornish game hen's body cavity.

So, the green stuff falling out of the hen's derriere is a chopped up apple, onion, and rosemary sprigs. These are called aromatics. As the name would imply, and what I've taken from Glade commercials, this has to do with the smells. When you cook a bird stuffed with aromatics, it makes the bird have notes of the aromatics. It is delectable. If you don't have an apple, onion, or rosemary, use your imagination. I know, it's difficult. I've used oranges, lemons, cinnamon sticks, garlic, etc. Think out of the box.

    8.  Take about a tablespoon of olive oil and rub this sucker down. Under the skin especially.

Lets have a lesson on oil and fat.
A little bit, is okay! Like avocados and almonds, olive oil has healthy fat. Not deep-fat fried onion rings fat. Heart healthy fats. The more oil you add to something and cook at a high temperature, it will crisp. Case in point, fried chicken. But, you won't be seeing that on here. Adding olive oil to the board will moisten the meat and get a nice brown to the skin.

    9.   Salt and pepper the bird. Nestle some garlic cloves around it, like an angel on a cloud.


    10.   Stick that bugger in the oven. For... 25 minutes.


While the bird is cooking,
    11.   Separately microwave 1/8 cup of water until it's bubbling.
    12.   Add a chicken bouillon cube to the hot water.
    13.   Add 1/8 cup of your clear alcohol to the water/bouillon concoction. That's right. If we're going to send the hen out with a bang, might as well involve some alcohol.
    14.   Add a tablespoon of olive oil.

After 25 minutes take the bird out. She should look like this:


    15.   Take your alcohol/oil/water concoction and spread it over the bird.
    16.   Turn the temperature of the oven down to 350 degrees.
    17.   Put the bird back in the oven.
    18.   Set timer for 25 minutes.
    19.   At the 10 minute and 20 minute marks, pull the bird out and baste it with the liquid that's sitting at the bottom of the pan.

To baste means to take the liquid that's leaked to the bottom, and to pour back over the bird. At least, in Lindsey's terms it is.

   20.   After the 25 minutes is up, pull the bird out.


As you can see, she has a nice, delectable, brown color to her. And believe me, it smells delicious.
Alcohol and garlic? I'm thinking that's a yes.

Let the bird sit for about 15-20 minutes so you don't burn your digits off. I've done that one before, because I was a little too eager to try it. Uhh, bad life decision. After the bird's cooled, cut it up (don't be shy, or you'll just have a pretty bird smelling delicious. You do have to indeed butcher it).

And you're done. Whoop whoop!


Pinterest Broccoli

     I don't care if you don't like broccoli. You WILL like it after you have it this way. I believe the roommate said, "I'm never eating broccoli any other way. Ever."

    But, I have to introduce you all to my Pinterest situation. As in, I am obsessed. If you don't know what it is, it's like a virtual bulletin board. I have recipes on mine. Which I actually make. A couple Pinterest experiments have gone bad, but mostly they're good. (The ones I pick, at least). I found this broccoli recipe on Pinterest, and all I gotta say is, damn.

You will need:
  • A shit ton of broccoli. I'm guesstimating 3-4 pounds. Yes, people stare at the grocery store.
  • 4 cloves of garlic
  • Olive oil
  • Lemon juice
  • Parmesan cheese
HEY, preheat the oven to 425 degrees.


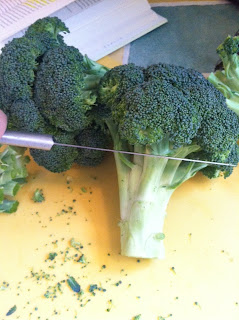
    1.   Decapitate the broccoli. I know, this blog's a tad vicious. My apologies.

So, growing up, my parents brainwashed my brothers and I when it came to broccoli. The dark green part was the "tree" and and pale green was the "trunk." Don't laugh, I actually eat broccoli. High five on that one, moms and pops!

    2.   Chop the garlic cloves and add to broccoli. I used my fancy garlic press to do that:


    3.   Add some olive oil in there. I don't really have a measurement, just add until there is a very slight coating, to the point that you can barely feel it. I toss this stuff with my hands; to make sure it's all evenly coated.

Again with the oil lesson, when you add oil, it will crisp whatever you're cooking. This is important when you're cooking.

    4.   Spread your broccoli/oil/garlic mixture on a baking sheet.


  5.   Stick the broccoli in the oven for 20-25 minutes. 25 minutes has worked better for me.
  6.   At the end of that time, pull out the tray and drizzle lemon juice and Parmesan cheese on top. Not kidding. Parmesan and lemon juice. Oh, and salt and pepper it.
  7.   I stick it back in the oven for a couple minutes to melt the cheese.

Before melting:

Melted and I'm drooling... Wait, whaaaa:

To conclude, clean up your shit and do the dishes. But not until you finish this divine meal.


     Recently, I've been going on rants which seem to end up with me train-rolling my roommate about how livid I am that I love socializing with people, but hate paying for food that I know I could make better. On top of that, that hen cost approximately $3, and the broccoli probably cost as much. This meal is cheap and delicious. And lets face it, I'm a poor college student. I obviously allocate my money to the important things (such as not eating Top Ramen, and paying the electricity bill so I can use the stove). I feel like challenging restaurants to actually trying; trying to make delicious food. The more I educate myself in the culinary arts, the more I become outraged for how much restaurants get away with charging. And for what? Sure, the experience, but sub-par food? That's inexcusable.

    I'm about to quit revisiting locations unless the food makes me close my eyes, escape to my food-gasm land, and makes me want to have another bite. It's rare, but damn, I love that.

   Until next time!
       Cuisiner eLLe (aka Lindsey)


P.S.  If you have questions or comments, please let me know!

Monday, October 31, 2011

October. Les do it.

This blog includes recipes for lasagna, pumpkin cookies, and pulled pork

Good lord. Who in the hell pressed fast forward on October?? Lack of blogs is due to my job and school. Boooo. Anyways, my apologies, and hopefully this makes up for the lack of good reading material.

This first recipe comes from People Magazine. It's Julianne Moore's recipe for vegetarian lasagna and it is very good. If the word "vegetarian" scares you, brown ground turkey or ground beef and add that in with the sauce.


Vegetarian Lasagna

12 pasta sheets from 1 box of oven ready lasagna It is very important that these lasagna noodles are oven ready.
6 cups of marinara sauce (Or 1.5 giant cans of the cheap-o spaghetti sauce)
4 tbsp. olive oil
1 clove garlic, chopped
1 bunch asparagus, sliced thin on bias
2 large zucchini, diced
Salt and pepper
½ cup grated Parmesan cheese
1 container (15 oz.) ricotta cheese
1 egg
2 cups shredded mozzarella

1. Preheat oven to 375.
2. Heat olive oil in a large skillet over medium heat. Add garlic and saute until golden (about 1 minute).
3. Add vegetables and saute for 4 minutes, or until golden brown. Season with salt and black pepper.
4. Combine ricotta cheese, ¼ cup Parmesan cheese and an egg in a large bowl. Mix well.
5. Spray a 13 × 9-in. baking pan with nonstick cooking spray.
6. Spread 1 cup marinara sauce on bottom of the pan.
7. Add a layer of 3 uncooked lasagna sheets.
8. Spread 1/3 of the ricotta cheese mixture on top.
9. Add 1/3 of the vegetable mixture and top with 1 cup of marinara sauce.
10. Layer 3 more sheets of lasagna
11. 1/3 of the ricotta.
12. 1½ cups marinara sauce.
13. Layer 3 more lasagna sheets, the rest of the ricotta mixture and vegetables and 1 cup sauce.
14. Finish with 3 lasagna sheets, remaining sauce, and top with mozzarella and the rest of Parmesan cheese.
15. Bake covered for 50-60 minutes.
16. Uncover and bake until cheese melts, about 5 minutes.
17. Let stand 15 minutes.
Enjoy!

To add some zing to this, I would rip up basil leaves and add to the sauce. You can never go wrong with basil.

I apologize for not adding a picture for this. I am a firm believer that you eat with your eyes first, then your mouth.

As you readers know, I am not perfect. I mess up on recipes and choose ones that are just...eh. That would be the case with the "healthy" cheesecake I attempted from a mass e-mail of a viral health blogger. Let me tell you, after a handful of "eh" results from her recipes, I will no longer be wasting my time. I know what tastes subpar, and that cheesecake was subpar. I'll try to keep tweaking it.

A blogger that I absolutely love is Gina from SkinnyTaste.com. All of her recipes besides one that I've tried are delicious. They don't taste like health food, which is great when you live with roommates who aren't on a diet. For these cookies, I didn't make the chocolate glaze because I don't like pumpkin and chocolate together. But these are a cakey consistency, and not too sweet.


Pumpkin Cookies

Ingredients:
4 oz 1/3 less fat cream cheese, softened
2 tbsp unsalted butter, softened
3/4 cup brown sugar, packed
1/4 cup sugar
1 egg
1/2 cup pumpkin puree
1/4 cup 1% buttermilk (I poured 1 tsp. lemon juice in a measuring cup and filled it to 1/4 c. with almond milk. You can do this with regular milk, as well)
1/2 tsp vanilla extract
1 3/4 cup all purpose flour
1/2 tsp pumpkin spice
1/2 tsp baking soda
1/2 tsp salt
1/4 tsp baking powder

For the chocolate glaze:
1/4 cup confectioners' sugar
1/2 tbsp unsweetened cocoa powder
1/2 tbsp 1% milk
1/8 tsp vanilla extract
pinch of salt

1. Preheat oven to 350°. Line baking sheet with wax paper.
2. In a medium bowl, beat cream cheese, butter and sugars together until light and fluffy.
3. Add egg; beat well.
4. Mix in pumpkin, buttermilk and vanilla.
5. In another bowl combine flour, spice, baking soda, salt and baking powder; gradually add to pumpkin mixture; mix well.
6. Drop by rounded tablespoonfuls, 2 inches apart onto silicone lined baking sheets.
7. Bake 12 - 14 minutes or until golden. Remove to wire rack to cool.

For the glaze: Whisk the confectioners' sugar, cocoa powder, milk, vanilla and salt in a bowl. Place in a piping bag or a zip lock bag with the point cut off and drizzle onto the cookies.

These are nummmmmy and approximately 2 points apiece.


I work with an authentic Texan. She told me this recipe, and it was fantastic. I invited my friend over for lunch to have this, and turns out, it's a great hangover cure. Tidbit!

1 can of Dr. Pepper (I used Diet Dr. Pepper and it still tasted delicious)
3 pound pork loin (According to WeightWatchers, it's a lean cut of the pig)
1 bottle of BBQ sauce (As you all know, I love Jack Daniels)

1. Pour Dr. Pepper in a slow cooker.
2. Add pork loin.
3. Let sit for at least 10 hours on low.
4. Remove pork and shred with forks.
5. Stir in BBQ sauce.
6. Add to bread, buns, or just enjoy by itself.

Easy, and delicious!


Any comments, questions, or requests? Leave a comment and I'll get back to you!

Until next time,
Cuisinier eLLe

Tuesday, September 13, 2011

It's Been A Long Time Coming

My oh so loyal readers. My apologies for being a giant slacker and not posting for over a month. I've been really busy with school starting and such. However, you should be happy to know that I have been keeping recipes that I have been making just to share with you.

Within the last month, I have also joined Weight Watchers. I've been feeling super unhealthy lately (even though I've never been an unhealthy eater). The stuff I've been putting in my body has created low energy and I've been prone to naps. Now that someone has to weigh me once a week, I'm being held accountable, so I'm sticking to the plan. How will that change the blog? Well, the recipes will more likely be healthier and have PointsPlus values attached to them. (If you aren't aware about Weight Watchers, it's a great plan that afixes a point value to every kind of food. You get a certain amount of PointsPlus you can eat in a day according to your sex, height, and weight. It's the one diet I've found that doesn't exclude something. It's all up to you if you want to have a cake or filling items throughout the course of the day. And no, they're not paying me to say this. I'm actually paying them to weight me. Funny how that works).

The first recipe I'm going to share is a vegetarian-friendly option. Don't run away in the other direction just because it doesn't have meat. Chill out. We'll get to the carnivorous options later. This is a recipe I found in Self in a burger feature they had. Now first of all, I invited a legit vegetarian over because it's one of the first things I've made that he can eat. He told me, "This is the best tasting 'burger' I've ever had." To me, that was a huge compliment. I've never really cooked vegetarian, so to hear this from someone who can only eat vegetarian, I was humbled.

This was called the black bean-corn burger, but I had kidney beans. And I like kidney beans anyways.


For "burger"
1 can rinsed and drained kidney beans
3/4 cup corn
1/2 green bell pepper, cut into 1/4" dices
1/4 cup whole-wheat bread crumbs (I didn't have any, so I put bread crumbs in the oven to dry them out)
1/4 cup chopped fresh cilantro
3 egg whites, lightly beaten
1 tsp. red pepper
1/2 tsp dried oregano
1/2 tsp. ground cumin
Olive oil

For "sauce"
1/2 avocado
1/3 c. reduced-fat sour cream
1 tsp. fresh lime juice
3 cloves of garlic

I used my whole-wheat bun recipe. It complimented these well.

1. Combine beans, corn, green pepper, breadcrums, cilantro, egg whites, red pepper, oregano, and cumin.
2. Heat a good layer of olive oil in pan over medium-high heat.
3. Form mixture into patties. A warning, these are kinda difficult to form into patties and to flip. Because the fatty component that is holding them together is the egg white, they tend to fall apart if you're not careful.
4. Add patty on pan. Brown 5 minutes on each side.

As you can tell, mine looked ridiculous.

5. Season with salt and pepper.
6. To make sauce, puree avocado, sour cream, lime juice, salt and pepper, garlic. (It makes a guacamole-like component).


7. Put a patty on a bun, and top with sauce.
8. Enjoy!


Now, I realize, I was very optimistic to try this. But, if I got my super skeptical roommate to eat these, you're safe.


Recipe two!


I don't know about the rest of you, but I have a large amount of pork chops in my freezer. I don't know where they come from, but they magically show up. And then I have pork chops for days that I don't know what to do with. So, I came up with this.


You need:
Two pork chops, cut into cubes
3 LARGE tomatoes, diced
4 cloves of garlic, chopped
1 1/2 tsp. oregano

1. Warm olive oil on a pan over medium heat with chopped garlic.
2. Add pork chop cubes.
3. Once pork has browned, add tomatoes and the juice, and oregano.
4. Let stew.
5. Serve.

Super simple. We paired this with salad and my homemade vinaigrette. That, is easy as well.

Vinaigrette
3/4 c. olive oil
1/4 c. red wine vinegar
Pinch of pepper
Little more than a pinch of salt
4 cloves of chopped garlic
A squeeze of mustard (No, I'm not joking).

Shake together. Leave at room temperature.

1 tbsp. is 3 PointsPlus.


Chocolate Zucchini Cake

You need:
1/2 cup butter, softened (I used olive oil)
1 3/4 cups sugar
1/4 cup canola oil (I used olive oil)
2 eggs
1 teaspoon vanilla extract
1 cup 2% milk (I used almond milk)
1/2 cup buttermilk (I used 1/2 tbsp. lemon juice + almond milk = 1/2 cup of imitated buttermilk)
2 1/2 cups all-purpose flour
1/4 cup baking cocoa
1 teaspoon baking soda
1/2 teaspoon baking powder
1/2 teaspoon salt
2 cups shredded zucchini
1/2 cup semisweet chocolate chips

1. Beat the butter, sugar and oil until smooth.
2. Add eggs, one at a time, beating well after each addition.
3. Beat in vanilla.

This is the tricky part!
4. IN A SEPARATE BOWL, combine milk and buttermilk.
5. In another SEPARATE bowl, combine the flour, cocoa, baking soda, baking powder and salt

6. Take the two separate mixtures alternately, beating well after each addition.
7. Fold in zucchini.
8. Transfer to a greased 13-in. x 9-in. baking pan.
9. Sprinkle with chocolate chips.
10. Bake at 325° for 45-50 minutes or until a toothpick inserted near the center comes out clean.

This recipe is definitely not Weight Watchers approved, but I'm going to try to make one. Bare with me. However, if you don't care, make this. The entire pan was gone in a day. I kid you not.


Weight Watchers Crepes

You need:
5 egg whites
1/8 tsp. salt
1 tsp. vanilla
1 c. milk (Whatever milk you choose. I used almond milk).
1 c. flour
Fresh fruit

1. Whisk all together until just combined.
2. Spray pan with PAM.
3. Let pan heat until hot.
4. Put 1/4 c. of batter on bottom of skillet.
5. Tilt skillet for the batter to cover the bottom.
6. Cook 2 minutes, flip. Cook 2 minutes.
7. Top with fresh fruit and sprinkle powdered sugar.
8. Fold in half.
9. Enjoy!

This is 3 PointsPlus. And nummy. I paired it with an egg white omelette with mushrooms. 4 PointsPlus breakfast. Score.


Again readers, I apologize for the long delay, but hopefully you enjoy the plethora of new recipes.

Until next time,
eLLe

Sunday, August 14, 2011

"Back to Basics" [Turkey] Sloppy Joes

Back when I was a kid, moms would make a massive amount of sloppy joes for the family. It was always filling and really easy to make. I looked at the recipe she gave me, Googled, and decided to tweak it.

A lot of sloppy joe recipes include tomato paste and stuff like that. If you've read my blog, you'd know that that stuff freaks me out. It's like tomato jell-o. Yick. I tried to puree some tomatoes and make that the base, but it wasn't thick enough. So, I used tomato soup.


Sloppy Joes

1 lb. of ground turkey
One diced onion
3 tsp. garlic powder
4 tsp. chopped garlic
2 1/2 tsp. cumin
2 1/2 tsp. worcestershire sauce
15 oz. can of kidney beans
3 large, pureed tomatoes
Can of Campbell's tomato soup
Salt and pepper to taste (I don't like giving specific directions on salt and pepper. People's tastes are different)

1. Brown turkey over medium heat in a saucepan.
2. Add onion.
3. Add seasonings.
4. Add kidney beans.
5. Add pureed tomatoes and tomato soup.
6. Add salt and pepper. Do the taste test to gauge how much you want in it!
7. Let simmer over medium-low heat.
8. Serve over buns.


I used my bun recipe that I posted before. It was delicious having hot buns and homemade sloppy joes.

Wednesday, August 3, 2011

Break-Yum-Fast

If you've read the blog before, you'd know that I'm lactose intolerant. I still do eat some dairy, but I limit it a lot more, and I'm NORMALLY pretty good about it. Well, last night, I was craving some coffee cake. Good coffee cake. So, I Googled. And I found a recipe on Pioneer Woman's blog. (It's the moms favorite food blog. Besides mine. Haha).

When I looked over the recipe, the total recipe called for THREE cups of butter. Not one or two, THREE. I decided to cut the butter down because I don't feel like having coronary artery disease at 23. I subbed the soy butter I featured in one of my other blogs, for butter, and subbed almond milk for whole milk. It's my lactose intolerant friendly version of coffee cake. And it's yummy.

This is a crappy picture, I'm sorry. It's not me, it's the Blackberry.

For the cake:
1 c. butter (I used soy butter. You can use whatever).
2 c. sugar
3 c. flour
4 tsp. baking powder
1 tsp. salt
1 1/4 c. milk (I used almond milk).
3 egg whites, beaten until stiff

For the "crumble":
1 c. butter
3/4 c. flour
1 1/2 c. brown sugar
2 tbsp. cinnamon

For cake mixture:
1. Preheat oven to 350 degrees.
2. Combine flour, baking powder, and salt in a bowl.
3. Cream butter and sugar for cake.
4. This part is tricky. Alternate the flour mixture with the milk until combined. That means, add a little flour, mix, add a little milk, mix, add a little flour, mix, add a little milk, mix. You get the point.
5. Beat egg whites until they have foamed a lot. Pioneer Woman calls this beating until stiff. Yeah, I don't know. I just followed it until mine looked like they did in the pictures.
6. Fold egg whites into cake mixture. This means mixing the sides into the middle with a spoon.
7. Spread into a 9x13 or larger greased cake pan.

For "crumble":
8. In a separate bowl, combine topping ingredients with a pastry cutter (or whisk, fork...whatever works for you.
I tried to do this, and it became a mush of deliciousness. There's no way that'd be crumbly. So, I took two ziploc bags on each hand, smushed balls of the mixture until flat, and dropped it over the cake. It worked but took a while.
9. "Sprinkle" over cake.

10. Bake for 40-45 minutes; until lightly browned.

Serve this business warm.

It makes a TON. The wife and I are gonna have non-dairy coffee cake for DAYS.

Nom nom nom.

So, I don't know if y'all have heard me rant about coffee cake, but corporate coffee shops who try to appeal to people by making breads that have no resemblance to coffee cake, but have coffee cake in the title are ruining everyone's perception of what coffee cake should be.

Coffee cake is made to be two layer. The bottom part is suppose to be an almost flavorless, spongey cake. The top, the crumble, is suppose to be a super sweet and sugary contrasting topping. You're suppose to eat coffee cake by taking a bite that includes the two parts. I've had people eat just the spongey cake part and complain that they don't like it. Well, you didn't eat it correctly. Not my fault. So try and have your bites incorporate both parts.

This coffee cake is good with coffee, milk, whatever.

Until next time!
eLLe

Thursday, July 28, 2011

Nom Nom Pasta

This is the pasta. THE pasta. Once you've had this pasta, you will be ruined of Olive Garden. Oh, and the kicker? It's quick.

Aglio e Olio
It is italian for garlic and olive
My recipe is a tweaked version of traditional aglio e olio.

You're going to need:
--Pasta (I use whole wheat penne or angel hair)
--A good amount of olive oil
--A head of garlic
--Red pepper flakes
--Salt
--Tomatoes
--Parmesan cheese

1. Put a bowl of water to boil over medium-high heat and add salt.
2. Make sure the noodles are halfway through cooking, and THEN put a saucepan over low-medium heat.
3. Add a generous amount of olive oil; enough to cover the bottom.
4. Chop five cloves of garlic and add to olive oil.
5. Add a generous amount of red pepper flakes.
Make sure not to brown the garlic too quickly. If you do before the pasta is done, it will make the pasta taste burned, which you don't want.
6. Stir frequently to combine the mixture.
7. Once noodles are done boiling, drain.
8. The garlic will start to turn a slight color.
9. Chop up some tomatoes (I used two) and stir.
10. The tomatoes will acquire a light glaze of garlic, red pepper flakes, and olive oil.
11. Toss pasta while the oil mixture is still over heat.
12. Increase heat to medium.
13. Make sure all of it is combined.
14. Salt and pepper to desired taste. (I recommend not salting it to desired amount because the parmesan cheese will add more salt).
15. Serve with fresh basil leaves and shredded parmesan cheese.


This pasta is delicious and extremely flavorful. It's amazing served with the traditional Italian sides; salad and French bread.

I originally had this dish in Eugene with a friend of mine at an amazing, legit Italian restaurant. This wasn't any Olive Garden, which I cannot eat at anymore because the flavor does not exist and it's a waste of money to me. Besides the French bread and salad, which I love. Everything else, no.

I'm sure you could impress someone with your skills if you were to whip this up.

Need any feedback, have any tips, just want to leave a comment? Let me know!

-eLLe

Thursday, July 21, 2011

I have mastered... CHOCOLATE CHIP COOKIES.

Some of my coworkers are either moving or quitting, so I took it upon myself to spontaneously throw a barbecue and Wii dance party that will probably last until the Wii hours of the morning. Haha, I didn't even mean to do that. Yusssss.

Side note, I was given a bread maker for Christmas, and YES, I actually use it. All the time. (Thanks Grandma!) There is no air freshener that can match the aroma of baking bread. Mmmmmm. I hope you can imagine this smell right now. And I have found the best recipe for hamburger/hot dog buns. This is one of the only recipes I have practically memorized. (Yes, I've said that recipes don't matter, but they actually do when it comes to a bread maker).


YUMMY BUNS!

Ingredients
1 c. water
1 egg
1/4 c. olive oil
1 c. flour
2 c. whole wheat flour
3/4 tsp. salt
1/4 c. sugar
3 tsp. yeast

You're going to need a bread maker for this recipe, so if you don't have one, my apologies, but you're missing out on fantastic-ness.

1. Put liquid ingredients in the bread making bowl. This includes the water, egg, and olive oil.
2. Next, Put in dry ingredients which includes both flours, salt, and sugar.
3. Create a small dimple in the flour with your finger that's not deep enough to reach the liquid ingredients. Put yeast here.
4. Start on dough/pasta setting.
5. When the machine is done, take out and split dough into 8 mounds for hamburger buns, or 12 for hot dog buns.
6. Preheat oven to WARM.
7. Spray cookie sheet with olive oil PAM.
8. Place mounds on cookie sheet and cover with a towel.
9. Place in oven for 10-15 minutes; enough time for dough to double in size.
10. Take out of oven and heat oven to 400 degrees.
11. Place rolls back in oven for 10-12 minutes; enough time for rolls to brown.
12. Take out and ENJOY.


These buns are delicious. The wifey likes stealing them and using them for sandwiches. They're just good.


So, I've been on a mission to find a recipe for the GREATEST chocolate chip cookie. One that leaves a moist cookie, flavor in the dough enough to compliment the chocolate. Plus, I love cookies. Who doesn't?

First and foremost, I love The Food Network. And Alton Brown; yes the crazy scientist looking dude from Iron Chef. He's the one gave me the phenomenal recipe for pizza. Not him personally, but his show, "Good Eats." I have learned that, more egg yolks makes the cookie chewier. As does a higher brown sugar to white sugar ratio.

I only had a 1/2 cup of butter, so I had to adjust. Plus it made only like 9-12 cookies.

1 c. butter
3 1/2 c. flour
1 tsp. salt
1 tsp. baking soda
1/2 c. sugar
1 c. brown sugar
1 egg
1 egg yolk
2 tbsp. milk
2 tsp. vanilla
Chocolate chips

1. Preheat oven to 350 degrees.
2. Cream 1 c. butter and 1/2 c. sugar and 1 c. brown sugar.
3. Mix in 1 egg and 1 egg yolk, and 2 tbsp. milk and 2 tsp. vanilla.
4. Gradually add 1 tsp. salt, 1 tsp. baking soda, and 3 c. flour.
5. Mix in chocolate chips. (I know everyone likes a different amount of chocolate chips, so mix until you think looks good).
6. Scoop into mounds ON WAXED PAPER on a cookie sheet. (I personally love massive cookies... Like the size of your face).
7. Bake for 10-14 minutes. (I cooked for 12 minutes, but that can change depending on your elevation or taste for chewy or crunchy cookies).
8. Let sit on cookie sheet for a couple minutes, then ENJOY.


Another random ADD input. I cut up ten pounds of potatoes for french fries I will be baking. I saw on the Food Network that if you let them soak in water overnight, it will make them less starchy. I'll let your know how they turn out. But, I will be tossing them with olive oil, garlic, and salt. Pretty simple stuff.

Oh! That'd be the bread maker beeping at me.

Until next time!
eLLe.